How Snap to Vent works
Three things to know: measure your vent, snap it together, push it back.
1. Measure your vent
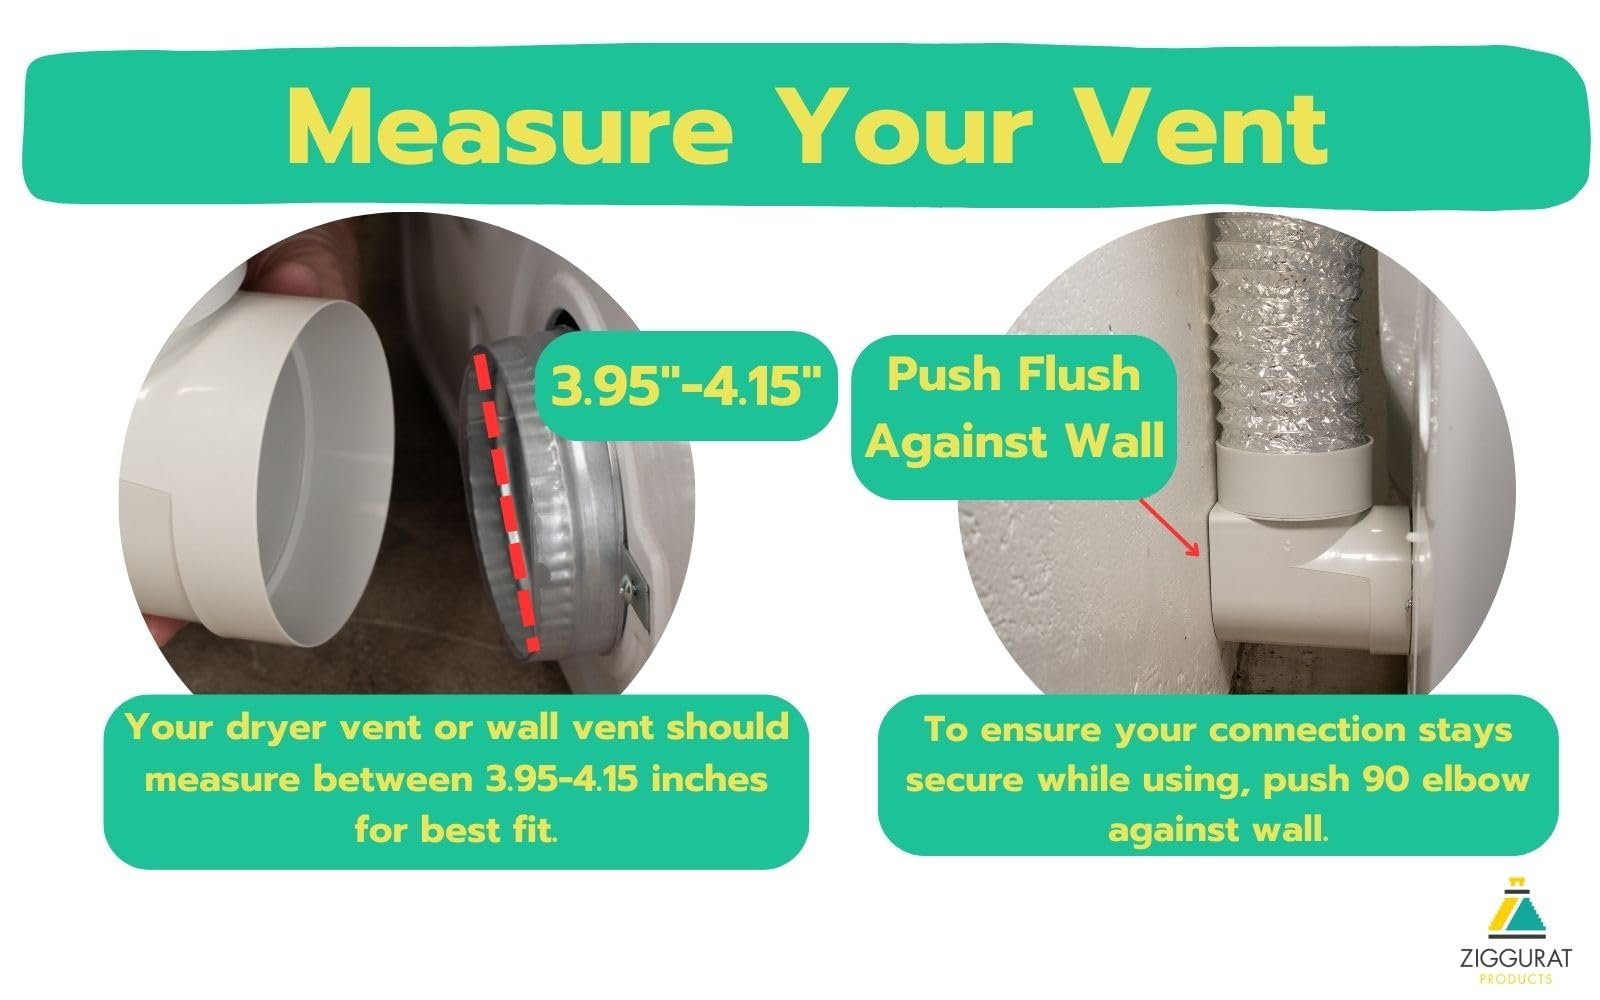
Measure the outside of your dryer outlet and your wall vent. Snap to Vent fits ducts from 3.95" to 4.15" across, the standard 4" dryer duct.
You will need roughly 4½" of room behind the dryer for the elbow.
2. Assemble the 90° elbow
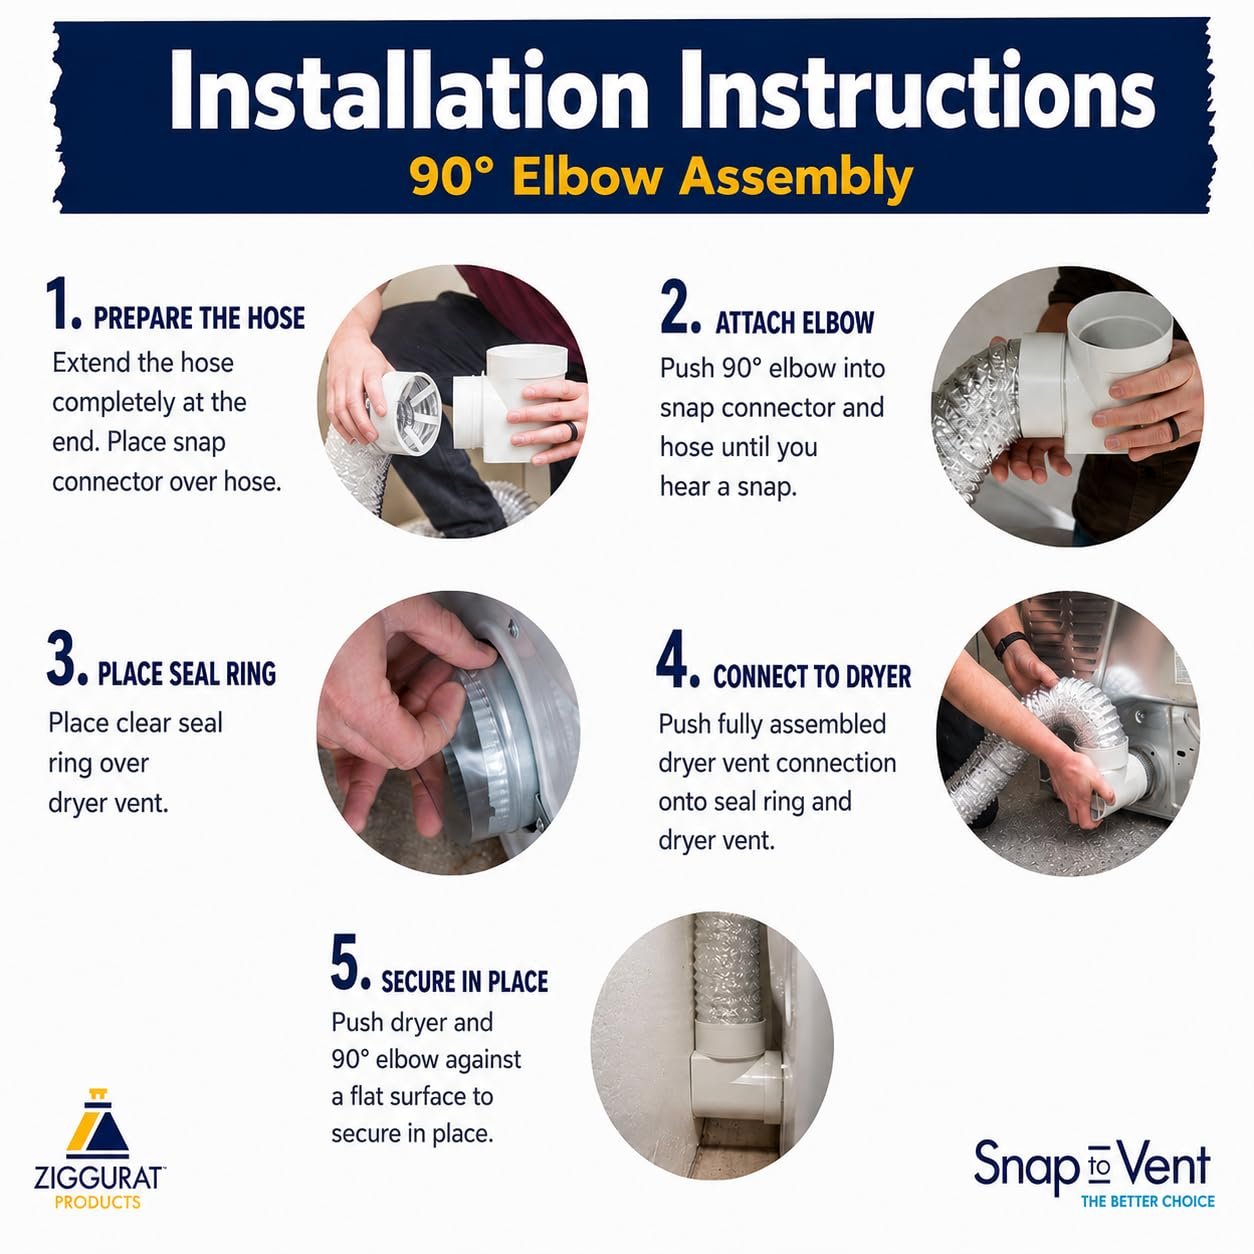
- Prepare the hose. Extend the hose completely at the end and place the snap connector over the hose.
- Attach the elbow. Push the 90° elbow into the snap connector and hose until you hear a snap.
- Place the seal ring. Put the clear seal ring over the dryer vent.
- Connect to the dryer. Push the assembled connection onto the seal ring and dryer vent.
- Secure it. Push the dryer back so the 90° elbow sits flat against the wall.
3. Assemble the straight connector (kits with a straight piece)
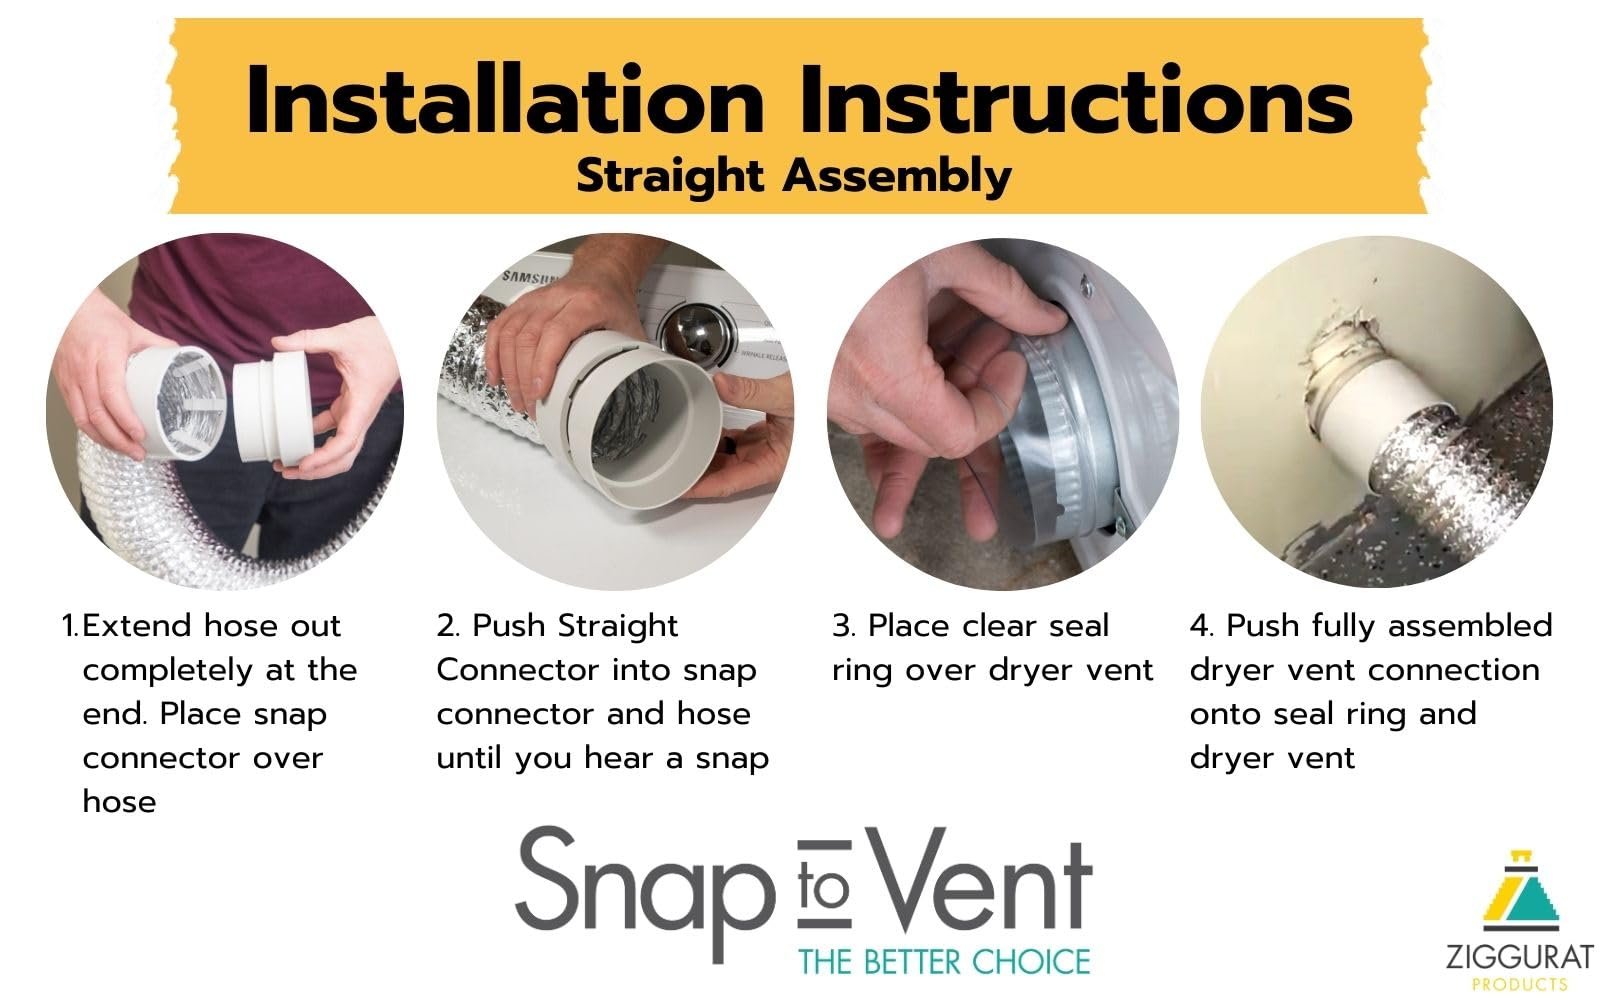
- Extend the hose completely at the end and place the snap connector over the hose.
- Push the straight connector into the snap connector and hose until you hear a snap.
- Place the clear seal ring over the wall vent.
- Push the assembled connection onto the seal ring and wall vent.
Installation videos
Watch each piece go together.
90° elbow
Straight connector
Full kit: elbow, hose and straight connector
Taking it apart for cleaning
Easy to take apart for cleaning
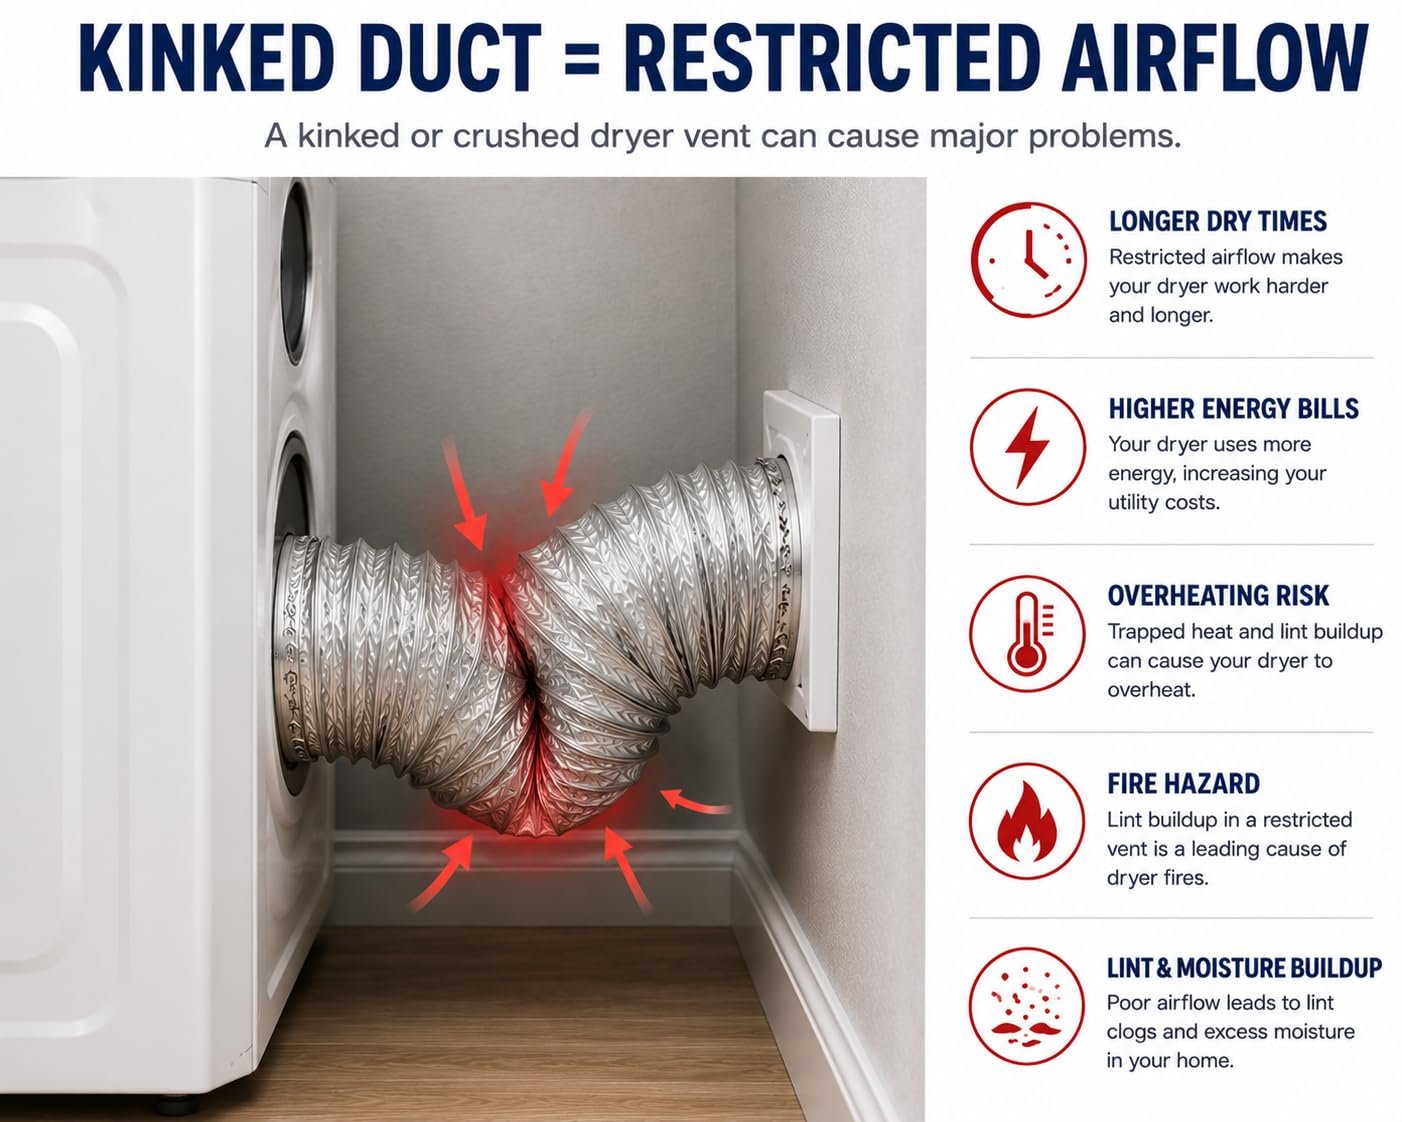
Lint builds up in every dryer vent. With Snap to Vent you can disconnect the ends to clean the vent and hose, then press it back on. The seal rings are reusable; just wipe them clean.
Need to replace the hose? Unsnap the fingers from the hose, swap in the new hose and snap the fingers back on.
Pick your kit
Every Snap to Vent kit installs the same easy way.